TEMPEST: Designing A Custom Split Keyboard
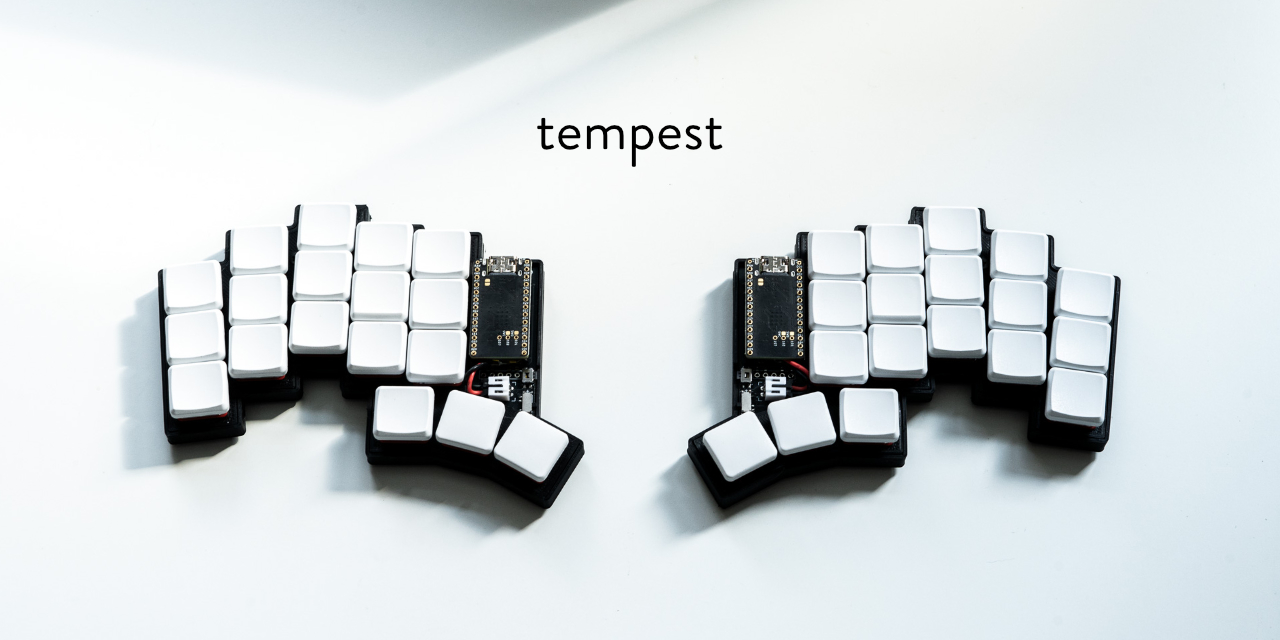
After a little while building and adapting split keyboards, I decided to design one for myself: TEMPEST — a low-profile, wireless, 36-key split keyboard.
TEMPEST reflects everything I’ve learned so far about what makes a keyboard genuinely comfortable and enjoyable to use, what works for me, and more than a few blunders in PCB layout.
This project builds on ideas I wrote about in “Thoughts on Customising a Split Keyboard Layout”, where I detailed the process of adapting to split ergo layouts, rethinking muscle memory, and designing a keymap that worked for me. With TEMPEST, I wanted to take that further—not just adapting layouts to existing hardware, but shaping the hardware itself around my hands, workflow and habits.
The full repo, with Gerbers, KiCad PCB, 3D-printable case, and ergogen design files is here: https://github.com/thrly/tempest. ZMK firmware configs and keymap layout can be found at: https://github.com/thrly/tempest-zmk.
Why Build a Keyboard?
It started with small frustrations: thumbs too cramped, pinkies overworked, layout compromises dictated by PCBs etc. I love my Corne keyboards, and others in the community like Sweep, TOTEM, and Chocofi look excellent… but none of them felt like mine, so I wanted to try making something that solved all those “if this thing was a little bit more __” issues.
Designing my own keyboard would let me integrate all the things I’d grown to prefer, cut the things I didn’t need, and, perhaps most importantly, own the full workflow: from PCB to firmware to daily use.
I should start by saying, my electronic knowledge is very basic. I’ve soldered modular synthesisers from kits, but never designed anything myself. Thankfully, keyboards are actually pretty basic in terms of circuitry, and tools like ergogen made the layout process ridiculously easy. This guide by FlatFootFox walked through the whole process and the KiCad routing. I would have been completely lost without it.
Design Goals
My staring point was my beloved Corne (the choc version from Typeractive specifically. As I say, I love it, but there are some things I don’t love and wanted to change.
With TEMPEST, I aimed for:
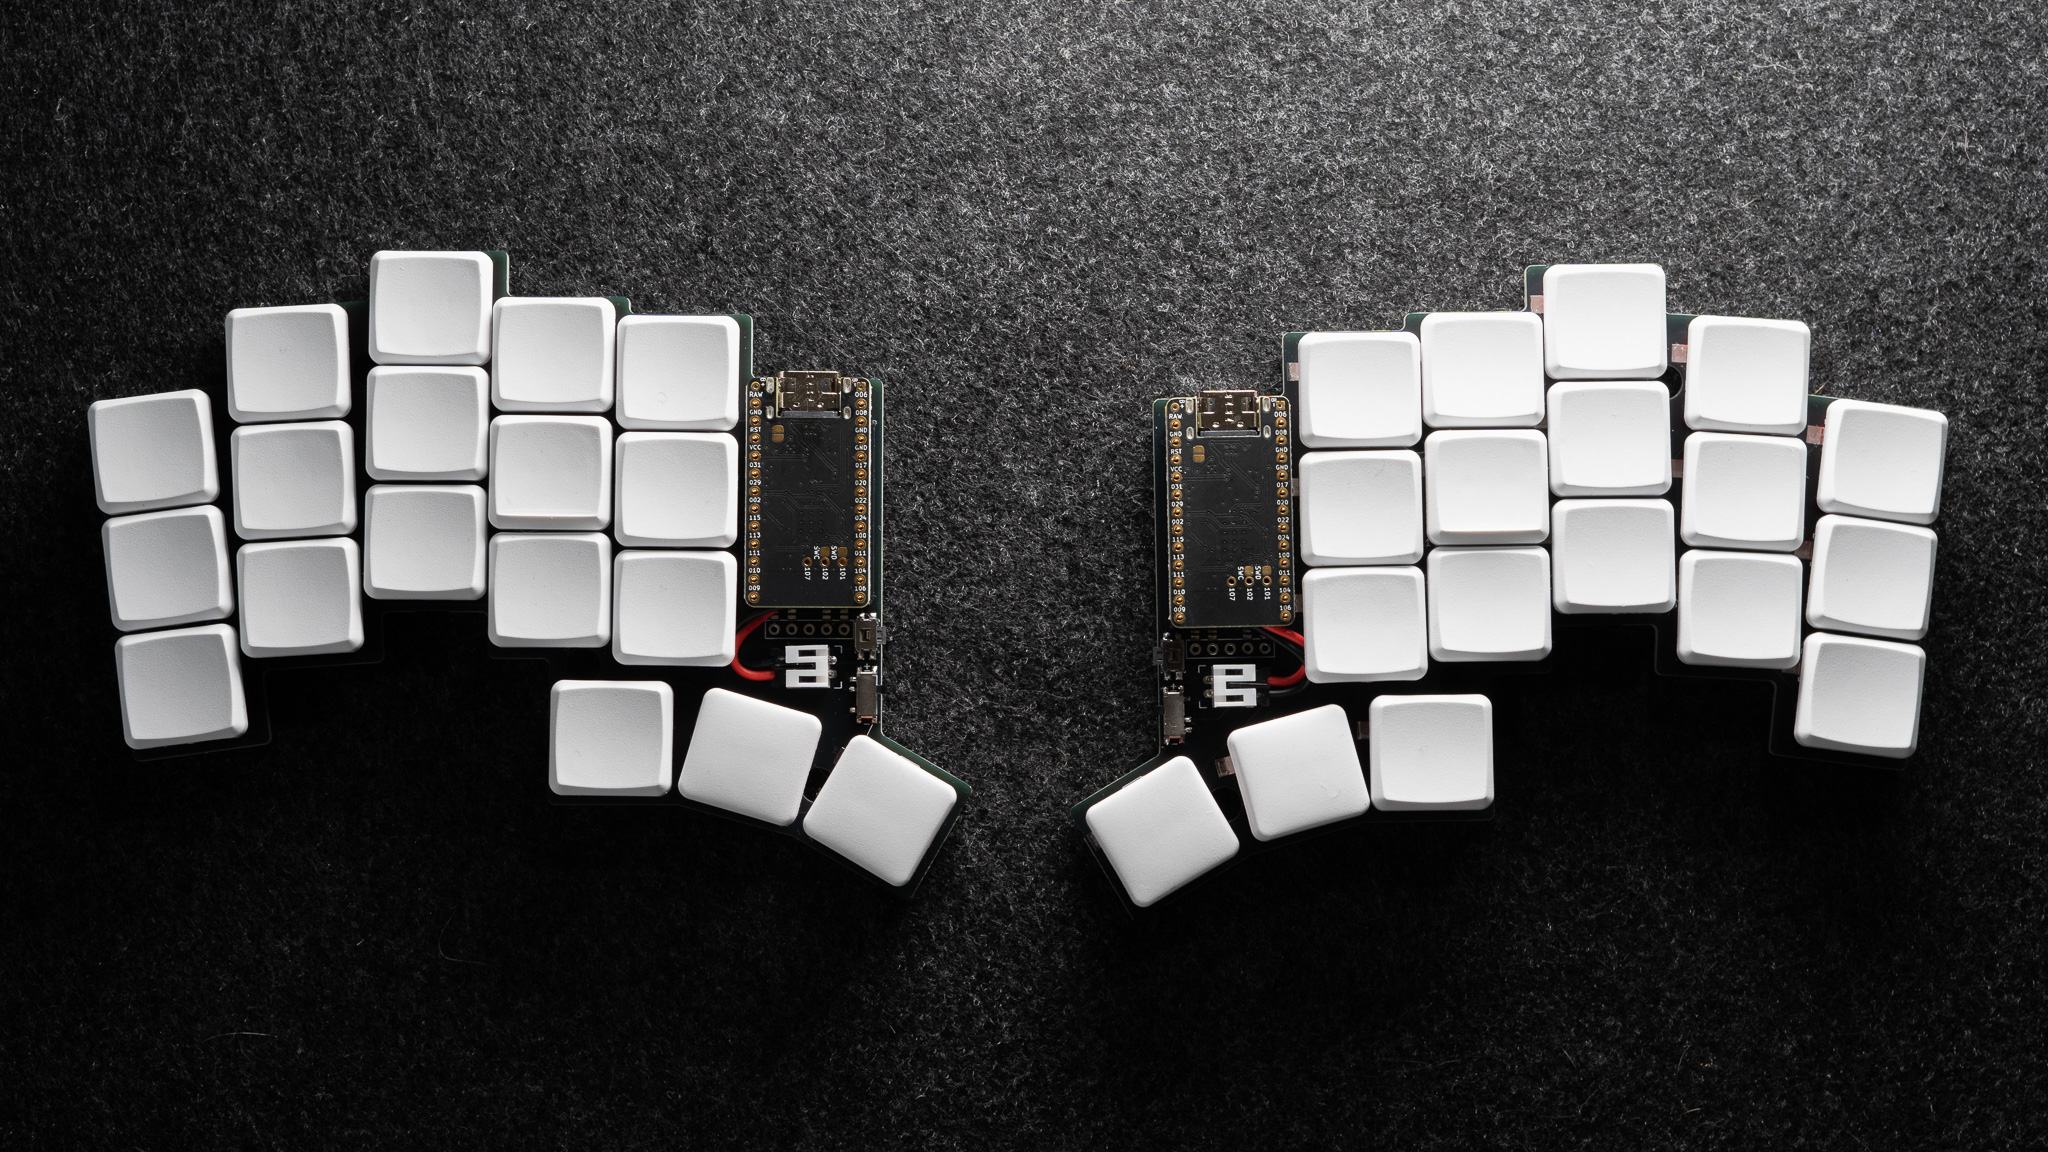
- 36 keys: A minimal layout (3x5 + 3 thumbs) that forces thoughtful layering and cuts away redundancy. Thumb cluster is spaced out a little wider than the Corne.
- (In an earlier version I played with snap-off extra outer keys, like the TOTEM but couldn’t make the PCB routing work).
- Custom column stagger: A little more pronounced that Cornes, and based loosely on my finger length and reach — especially important for the pinky and ring fingers. I also added some slight splay to the ring and pinky columns, again, a la TOTEM.
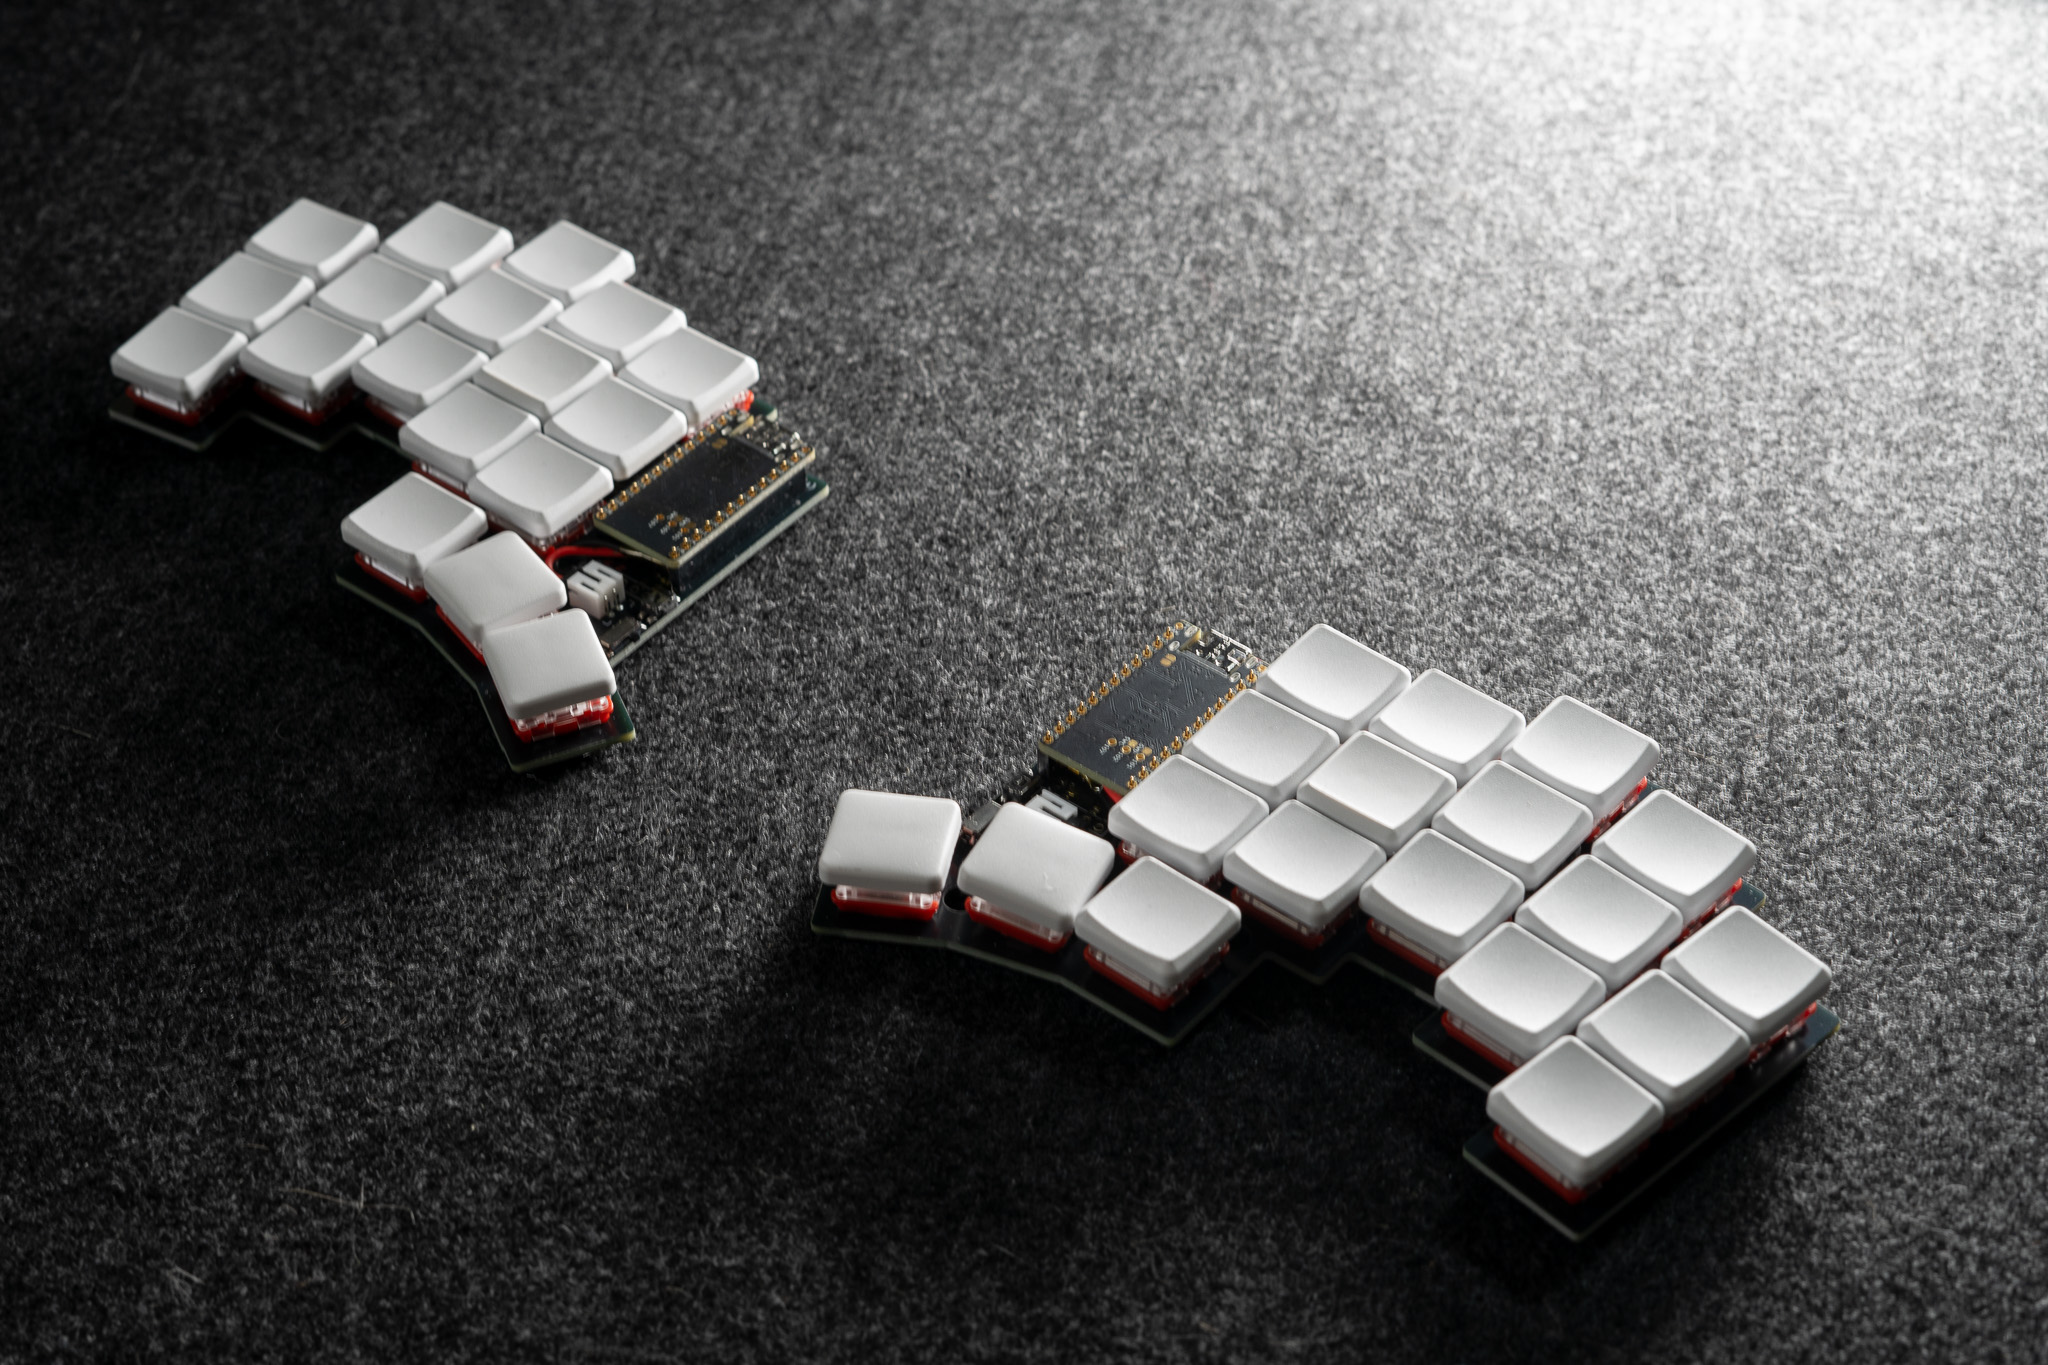
- Low-profile Choc switches: Nice and comfortable, I love my Ambients Twilight for long sessions and great for portability.
- Wireless-first design: Powered by nice!nano controllers and onboard integrated battery support. This all follows the Typeractive Corne build which I think is excellent.
- I tried to add nice!view display, but screwed up the connections on v 1.1, so this doesn’t currently work…
- ZMK firmware: I’ve grown to prefer the workflow and customisability of ZMK, especially its support for home-row mods, combos, layered design, and the GitHub automated build.
- Reversible PCB: Makes for more cost-effective fabrication, and there’s a certain elegance to it.
- Simple low-profile 3D-printed case.
All of this is designed in Ergogen + KiCad and then hand-assembled. The result is a clean, compact board that’s become my daily driver at home and on the go.
Firmware and Layout Philosophy
ZMK has become central to my keyboard setup. The firmware workflow (especially now with GitHub Actions) allows me to treat firmware the same way I treat code—versioned, repeatable, and documented. The TEMPEST repo builds firmware automatically with every change, making experimentation easy. I wouldn’t say its totally frictionless, as you still need to manually flash the new firmware via USB for each change, which is a pain.
The layout follows principles I wrote about previously on “Thoughts on Customising a Split Keyboard Layout”:
- Mod-taps for home-row modifiers.
- Layered access to symbols, navigation, and media keys.
- Thumb-focused design with three keys per side — one for space, one for layer switching, and one for backspace or enter, depending on the context. (I’ve also added a mod-morph to easily add underscores
WHEN_WRITING_IN_ALL_CAPS, which is nice.) - Combos and sticky keys to reduce awkward reaches. I’ve really been getting into combos on the default layer on a 36-key layout. Common things like
-_'"- I added a cheeky
F19macro onq+t+y+pwhich Autohotkey returns asconsole.log(Take that JavaScript!
- I added a cheeky
After lots of of refining and daily use, the layout feels second nature. The consistency in structure makes relearning layers on different devices (or different computers) much easier. I no longer think about where things are — they just are.
BONUS: On the config repo, I’ve used the brilliant Keymap Drawer by caksoylar to produce automated layout diagrams each time the keymap is updated.

Takeaways and Lessons Learned
Designing TEMPEST wasn’t just about soldering and scripting — it was a full-stack project. Here are a few key lessons from the process:
-
Start with use cases, not features. It’s easy to get caught up in extras (RGB, encoders, OLEDs), but focusing on how I actually type helped me prioritise the core layout and form factor first.
-
The thumb cluster is everything. I think many boards get this
wrongcramped. Iterating on placement, angle, and spacing made a bigger difference than almost anything else. -
Muscle memory takes time, but it pays off. A minimal layout forces you to be intentional. At first, it’s frustrating; over time, it’s freeing.
-
Wireless has trade-offs. I love the tidy setup and portability, but wireless introduces extra debugging and some latency trade-offs, especially for certain workflows (e.g., gaming). That said, for writing and coding, it’s been rock solid.
-
Designing PCBs is empowering. Even with the learning curve of KiCad, being able to iterate on physical design is liberating. It’s coding, but for your hands.
Most importantly: making your own keyboard turns typing from a task into a craft. You’re not just pressing keys — you’re engaging with a tool you’ve built, shaped, and refined. Every time I type now, I get a smug, satisfied feeling that I made this. (To counter, everytime something goes wrong with it, I’m entirely to blame…)
Final Thoughts
TEMPEST might not be the end of my keyboard journey — there are always new ideas to try and I’ve already got plans for v2 — but it’s the first keyboard that feels complete for my current needs. It’s the result of lots of iteration, both in code and hardware, and I’m genuinely proud of it.
If you’re curious about the layout, want to build one yourself, or fork it for your own experiments, the full repo is here: https://github.com/thrly/tempest
Happy building — and if you do make your own version, I’d love to hear about it.
Lastly, credit to the keyboards that inspired and informed TEMPEST:
- Corne by foostan (and the Typeractive version)
- TOTEM by GEIST
- Temper by raeedcho
- Bad Temper by essFitt
- FORAGER by carrefinho
- Chocofi, Sweep, and others.